版本為TMS v120,請務必記得事先備份
下載IDE
在開始之前,我們要先下載一個IDE – NetBeans IDE 我使用的是 7.4 版本,下載請點我。
新增專案
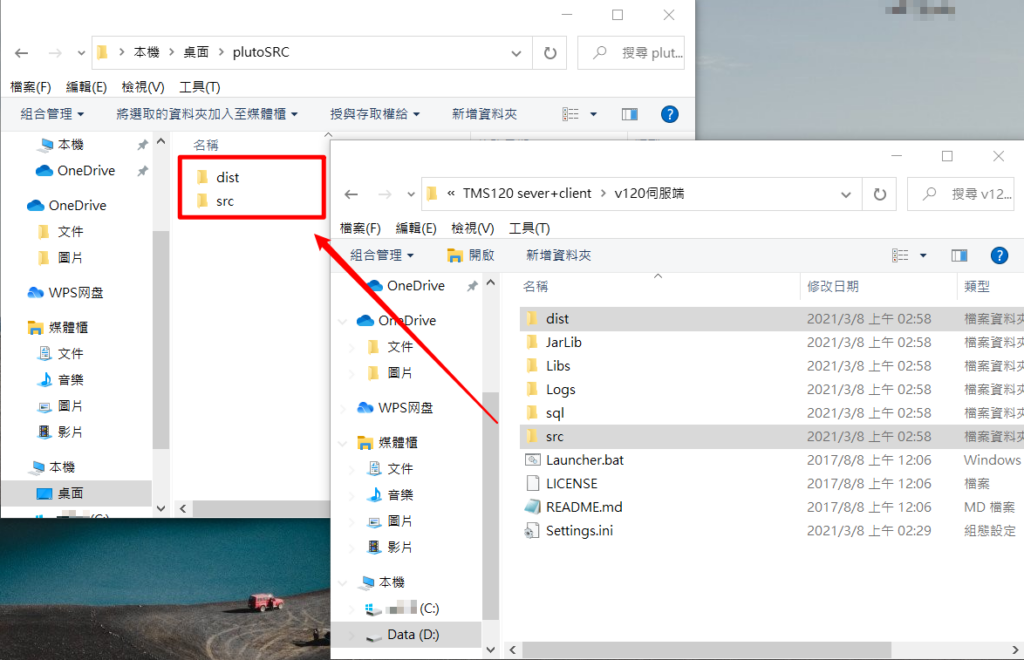
在開始之前,先複製伺服器端的 dist、src 資料夾到一個資料夾。
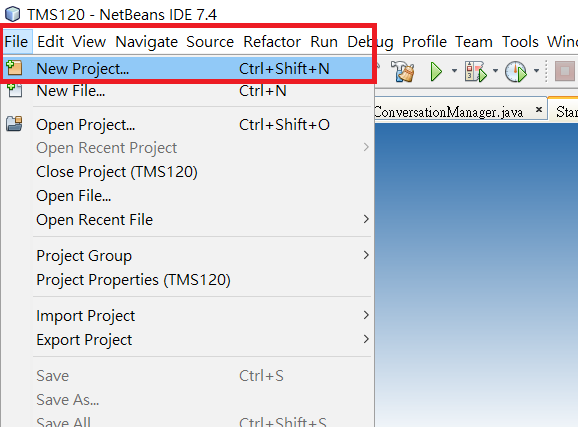
接著打開NetBeans IDE,File – New Project…。
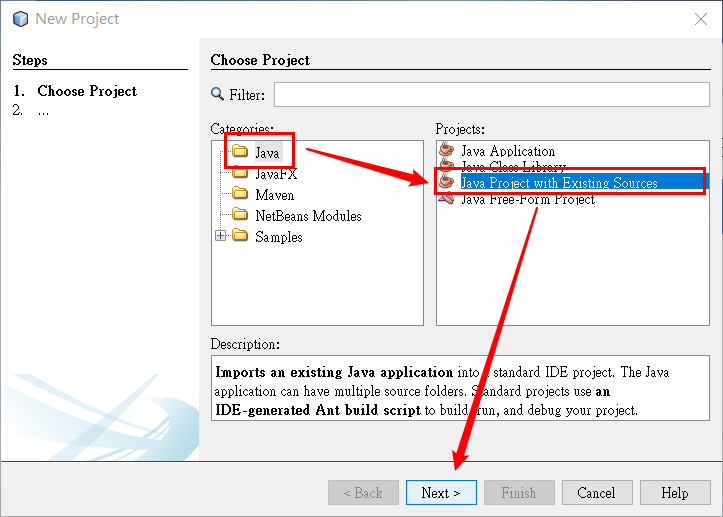
選擇 Java – Java Project with Existing Sources – Next>。
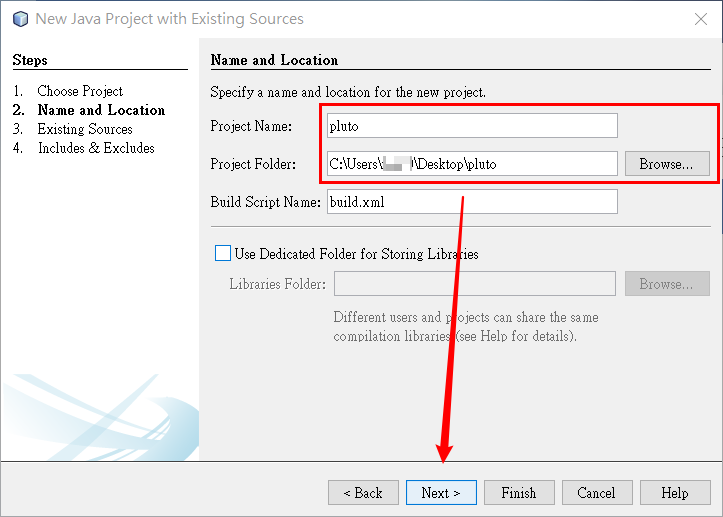
輸入專案名稱(隨意名稱) 和 選擇輸出資料夾(隨意位置) 後按Next> 。
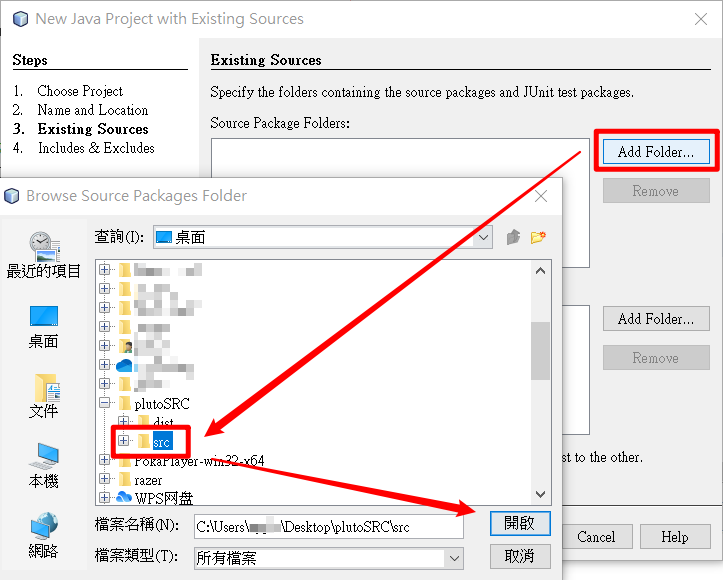
Source Package Folders右側Add Folder… 選擇 src資料夾(不要點進去)後按開啟。
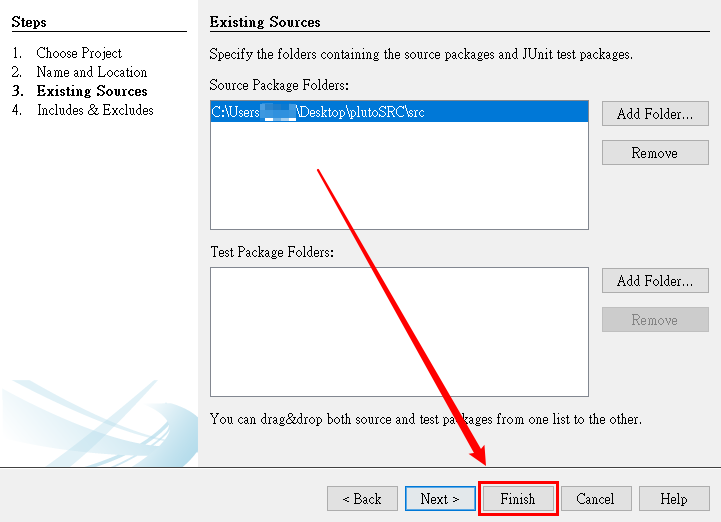
直接按Finish。
新建成功後左側會出現一個新的專案,內容包括
- Source Packages(你的SRC內容)
- Libraries
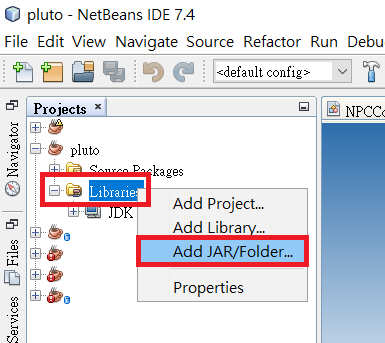
在Libraries上按右鍵 – Add JAR/Folder…。
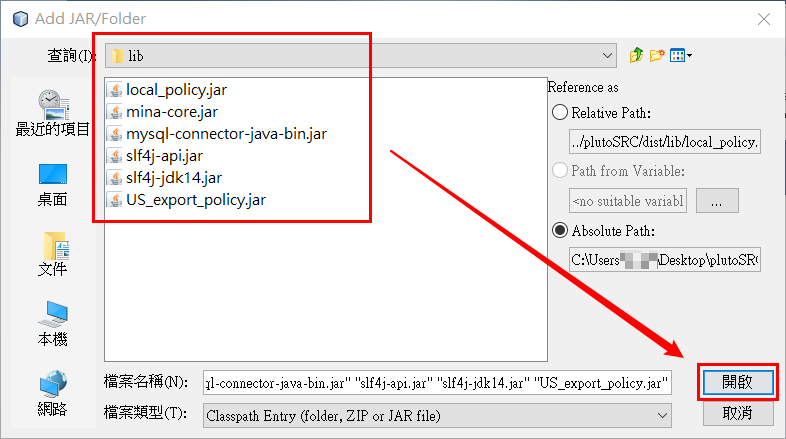
選擇dist\lib內的所有jar檔開啟。
開啟後Libraries內就會出現你伺服器端中的jar檔了。
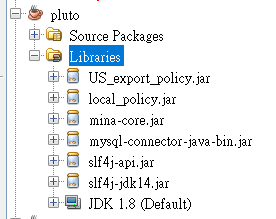
出現亂碼
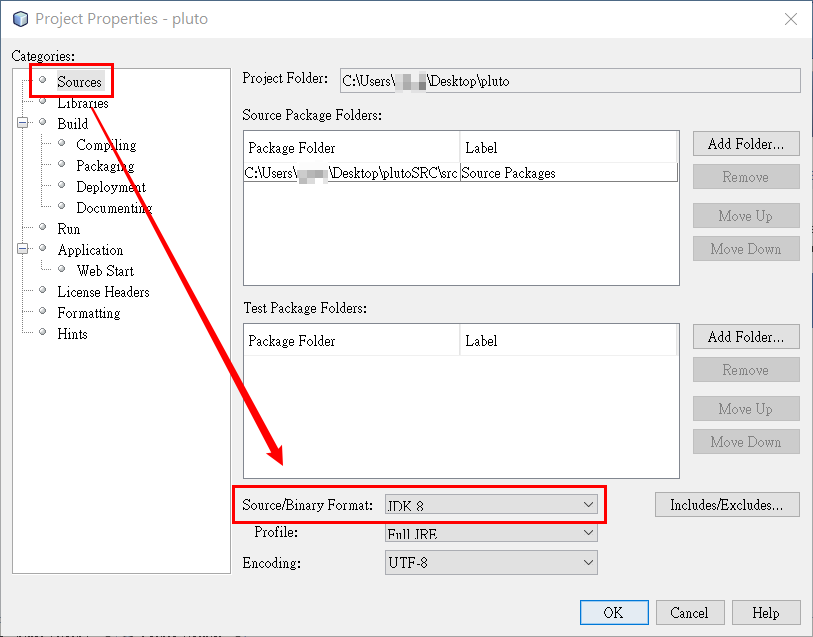
若出現亂碼很可能是你的專案Java版本選擇錯誤,在專案上按右鍵 – Properties。

Sources – Source/Binary Format 選擇正確的JDK版本 (整合包內的版本是JDK8)。
修改JAVA檔
以「拍賣」鍵改為呼叫萬能NPC為例,修改拍賣內容的檔案在 handling – MapleServerHandler.java 中。
搜索 ENTER_MTS,將內容修改為呼叫NPC(萬能NPC)即可。
會使用到的語法:
c.getPlayer().getLevel(); //獲得玩家等級
c.getPlayer().dropMessage(5, "訊息內容"); //跳出訊息
NPCScriptManager.getInstance().start(c, NPC編號); //開啟NPC對話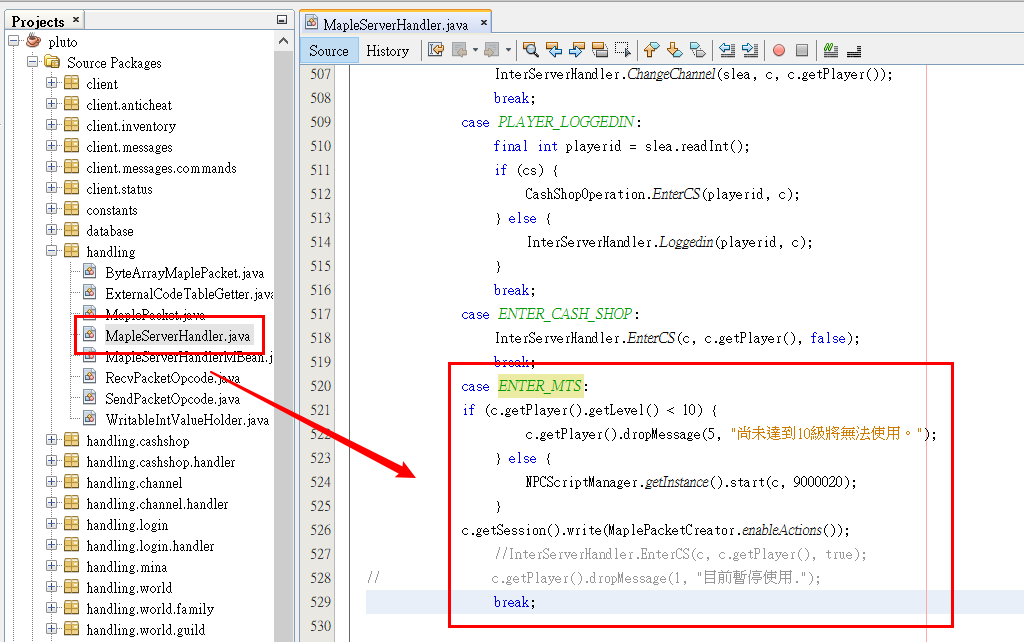
(程式碼僅供參考,可自行修改)
完整代碼
在最上方 import 處加上
import tools.MaplePacketCreator;
import scripting.NPCScriptManager;
*請注意每個case之間的內容是互不相關的,不要把別的case誤刪了。
case ENTER_MTS:
     if (c.getPlayer().getLevel() < 10) {
        c.getPlayer().dropMessage(5, "尚未達到10級將無法使用。"); //若玩家等級小於10級,跳出訊息「尚未達到10級無法使用。」
     } else {
        NPCScriptManager.getInstance().start(c, 9000020); //如果玩家大於10級則呼叫NPC 9000020 對話。
     }
     c.getSession().write(MaplePacketCreator.enableActions());
     break;
編譯輸出
修改完後,上方工具欄找到一個槌子旁邊有掃把的圖示點下去
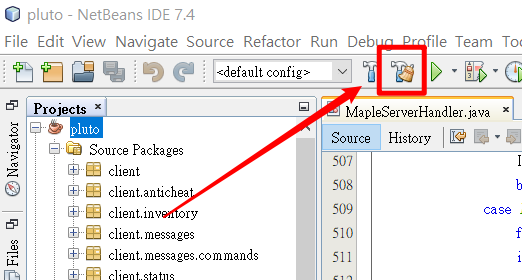
直到下方輸出視窗跳出 BUILD SUCCESSFUL (total time: ? seconds) 就表示編譯完成。
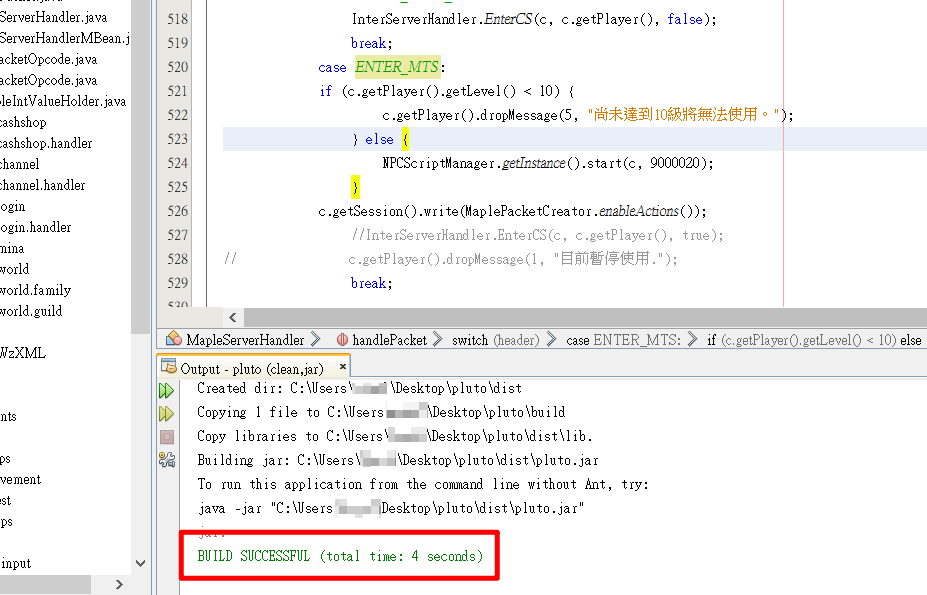
接著在輸出資料夾內可以看到有三個資料夾和兩個檔案,這個 dist 資料夾就是伺服器端的 dist 資料夾。

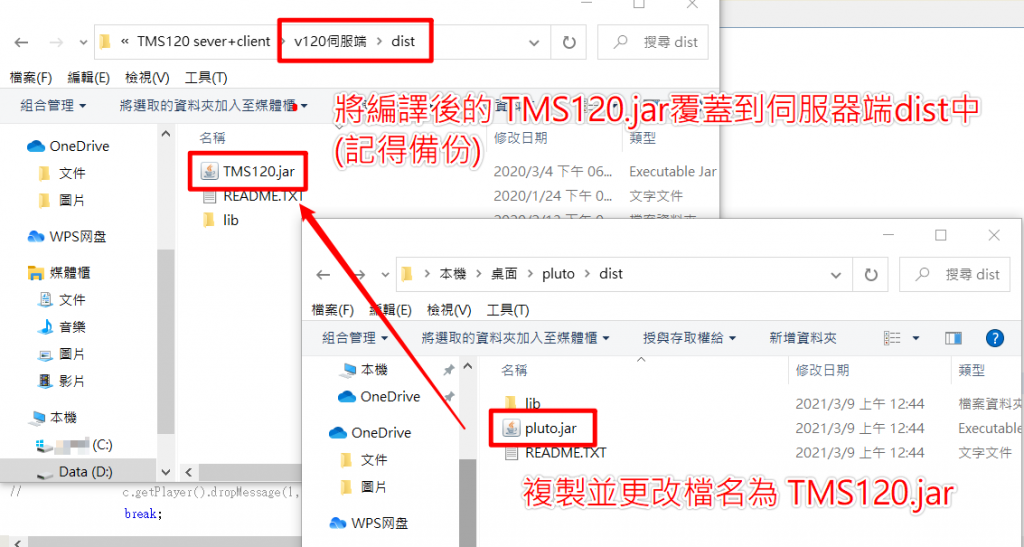
將輸出的dist資料夾中的 專案名稱.jar 修改檔名為 TMS120.jar 然後覆蓋回 伺服器端/dist 資料夾中。 (修改的檔名取決於你伺服器端dist中的jar檔名,覆蓋前記得備份。)
學習網站
這邊推薦幾個給新手架私服學習的網站
AICL社群娛樂集團論壇的楓之谷綜合技術交流版、AICL社群娛樂集團 網站
CSDN、巴哈、github…等搜索關聯詞也可以查到有關私服的內容。


